Friday 6 December 2013

Rainbow Gecko Gallery Handmade Journal

Hi Readers, 
I love making art and I have all these blank art books, but it has been bugging me for a while that although I can make great artworks and cards, my "art books" are terrible. So I have come to the conclusion that I work best on single sheets not in books ( and im not overly fussed on the whole spiral bound journals ) Now in saying that I have been wanting to bind my own journal for a while now, and have really struggled in making my own. With Art Camp, Christmas, My Birthday and New Years coming up I wanted a journal  so I did it.....
I used cheap watercolour paper and collaged half of my papes front and back with my art table clean up pages. 

I then folded them in half, scored the fold, placed one collage piece and one plain to make the signatures. 

I used a cardboard cover and bound the signature to the cover.
By using the cardboard as a cover the thread did tear at the holes a little bit. this didnt bother me as i will be taping the spine and corners of the journal to make it a little more durable. 
There are many bookbinding tutorials online, find one that suits you and have a go.
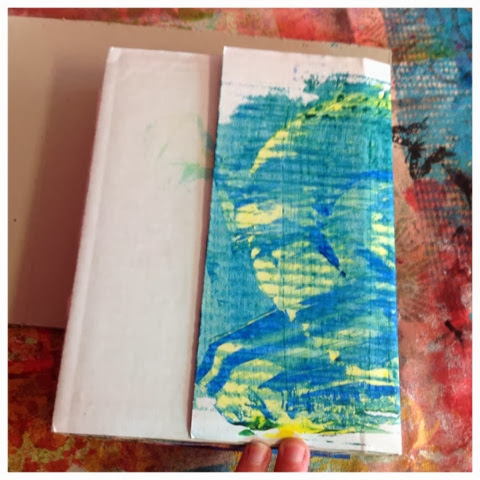
I wanted my journal to be able to be expande so I made mine with a Folio type front, so as it expands I will still e able to secure it shut. 
Now as I am new to binding I had some gaps between my pages so I attached envelopes and pockets to hold collage pieces and a small blank mini book. Now its not perfect or totally finished, but it will be great for what I need it for and I think it's a good first attempt at binding a journal
Thank You
Sarah
Rainbow Gecko Gallery


Tuesday 5 November 2013

Rainbow Gecko Gallery 2013 Ihannas Postcard Swap

Hi Readers, 
This November I am participating in the 2013 ihannas postcards swap. I make ten postcards to send out and swap with ten people from around the world. 
Here is the process of making my ten postcards.
I decided to make my postards 5 by 7, the reason for this is I was already trading happy art cards in that size and as I was cutting up a art paper pad this size had less waste. Using a craft knife and ruler I measured my cards and cut the out of heavy watercolour paper. 
Making the backgrounds
I use lightweight paper to cover my table while I paint and all my excees paint ends up on it, my clean up paper, this is what i use for my backgrounds. I sprayed this paper with my homemade watercolour sprays to add more colour. See previous tutorial.

Cleanup paper coloured with watercolour sprays

Making Butterfly Collage Stamps
I have been experimenting with making transparent collage stamps recently.see previous tutorial
I made a lot of these stamps as i wanted three for each postcard. 
Butterfly collage stamps on lunch wrap paper

Putting it all together
Once I had all the elements for my postcards it was time to put them together. 
First I glued my blank 5 by 7 watercolour paper to the back side of my watercolour sprayed cleanup paper and allowed it to dry. When dry I used a ruler and craft knife and cut of the excess paper.
The result was ten cards with colourful backgrounds
I then cut out all my collage stamp
I then used one of my favourite household stamps and printed a silver spiral print over the top of the colourful background.
I cut out all the butterfly collage stamps ( which took forever ) and using clear glue, carefully glued them onto the postcards. This is a bit tricky as the lunch wrap is very thin. Remember to glue on top as well to help with transparency. 
After all the cards had their butterflies I had to decide what ( if anything) to do next. I ended up leaving them so i could think about it and a few days passed before i come up with how to finish them. Itwas as simple as painting a black border.
These are my finished cards for the 2013 Ihannas Postcard Swap 
For more information about the ihannas postcard swap and to make sure you are ready for next years swap have a look here..
Thankyou
Sarah
Rainbow GeckoGallery

Sunday 20 October 2013

Rainbow Gecko Gallery Collage Stamps


Hi Readers, 
Each month I participate in a "Happy Art" swap and trade art cards with ladies from around the world. Organised and traded by my friend Sandie..(see button on my sidebar) I have found that I make beautiful colourful backgrounds for my cards and each month I struggle to complete them as I don't want to cover them up. I've been brainstorming hard this month about how i can overcome this and I have arrived at a new technique? One of the ideas that has been floating around is what happens to paper when oil gets dropped on it, it becomes translucent. This is the effect I wanted to achieve. I had a roll of "lunch wrap" that I bought from the supermarket in my studio and it was a little transparent. I never used it before as it made white fold lines when scrunched, but it was perfect for this project. 

Lunch wrap waxed on one side paper on the other.

I have rubber stamps that I use in my art (I confess I don't have any stamp pads) I use my rubber stamps with acrylic paint, I'm not sure how this would work with ink as the paper is waxed but it may work if you stamped on the paper side, I suggest using waterproof ink. I gathered up my usual supplies, pouncer, well loved stamps, and black acrylic paint.


 Using the pouncer foam brush apply paint to stamp and press onto paper. Yes it's that simple. 
Here is the finished pieces stamped onto lunch wrap paper. 

Now I let this page dry overnight so I knew it would be dry and give the best chance of not rubbing off the paper. ( remember this was an experiment I wasn't sure if it would just end up a black blob of paint) 
When dry cut out around your butterflies, I left a gap but you can cut around the outline. I got a spare background card and painted the non stamped side with clear school glue.
This is the glue I used 

Once I glued the butterfly the paper became more translucent. I carefully placed the butterfly onto the card and added more glue if needed. 
This was the step I was concerned about. I had to seal the top side of the butterfly, the stamped side and I didn't know by doing this if the paint would come off the paper. 
I used the same glue and coated the top and the paint didn't come off and you could see the coloured background through the wings of the butterfy. It worked. 
Here is the butterflies on the background of the card for the happy Art swap.
It is not clear like a sticker would be but it's a great way to layer over colourful backgrounds.
Thank You
Sarah
Rainbow Gecko Gallery


Monday 23 September 2013

Rainbow Gecko Gallery Handmade Spray Dyes

Hi Readers, 
I thought I'd share with you whats been happening in my art studio over the past week. One of the things I have been playing with has been making my own sprays.

What you need
Empty spray bottles
Food dyes in whatever colours you like
Water
Something to spray onto, fabric or paper

Very simply all I did was pour a little dye into the bottom of each bottle and slowly add water. Test your sprays until you have your desired colour. 
Spray bottles I bought online, you can use ones you have at home.
The food dyes I used, purchased from the supermarket.
Here is my first test page, the colours I have used are Red, Yellow, Blue, Green, Pink, I also made a Purple. I used Artsyville Washi Tape to identify the colours, and it also looks pretty. 
Of course the first thing I had to do was make RAINBOWS. This is sprayed onto copy paper.
Sprays on baby wipes and watercolour paper. 
This is my clean up paper after spraying on top of it, I will use this for collage.
Using stencils and sprays.
A fabric clean up sheet, this is done by printing with all my left over paints and spray overflow.

Butterfly detail on fabric. 
Stamping detail on fabric.
Stencilling detail on fabric. 
This is the final result of the fabric piece. I will most likely cut this piece up and sew into journal covers, bags and pencil cases. There are limitless ideas you can make with your finished piece.  
You want your sprays to be bright when they are wet as I have found once dry they with fade a little bit. You don't have to spend a lot of money on fancy art supplies, look through crafty eyes and see what you can use from around your home.
Thank You 
Sarah
Rainbow Gecko Gallery


Monday 16 September 2013

Rainbow Gecko Gallery Artist Statement

Hi Readers, 
I wanted to share with you, why my brand is called Rainbow Gecko Gallery. First though let me introduce myself.....My name is Sarah, I am 33 and i live in Tasmania, Australia. I got serious about Mixed Media Art about a year ago and created Rainbow Gecko Gallery.
Where did the name come from? I have always loved Geckos and the colour Rainbow. Ever since i was about sixteen I wanted to get a tattoo of a Rainbow Gecko, Now in my personal opinion, I think tattoos are overrated, everyone has one. For me, I never thought I would get one. So why did I ? I got my tattoo as it is me, in the 10 years between knowing what I wanted and actually getting it done...THE DESIGN NEVER CHANGED....I have a 5cm rainbow gecko crawling up the back of my ankle...for anyone if you want a tattoo, choose your design, think about it for a few years, and then if you still want it..get it..make sure you are 100% happy with it. IT IS PERMANENT. 
My Rainbow Gecko Tattoo...

So after the tattoo a great friend of mine made me my surfboard which I designed a huge Rainbow Gecko on the front, and rainbow all down the back. It was amazing.
This is my Surfboard...shaped by Glen Johnson Gangsta Surf.

Hopefully this will help explain why my brand is Rainbow Gecko, now to explain the Gallery part....
I called it a gallery, not necessarily because I have a Gallery, but because of the Gallery of products I make...from Art, Jewellery, Photography, Stationery and more.....
Thank You
Sarah
Rainbow Gecko Gallery

MY ARTIST STATEMENT

RAINBOW: Is my favourite colour, my art is bright, colourful and RAINBOW.
GECKO: Is my favourite animal, my power animal, a "solar powered" animal, just like ME.
GALLERY: For the range of products I create and make, it's a GALLERY from Photography,Jewellery, Art to Stationery, Bags, and Fabrics, a little bit of everything.

My works are free and expressive, always bright, metallic and glittery.
I use butterfly, flower and feather imagery, I create stamps, stencils and artist collage papers to use in my artworks.
I design, create, paint, draw, print, collage, sew and bead in my art and craft.
I am a learner, teacher, inspirer...
I am RAINBOW GECKO GALLERY


Wednesday 11 September 2013

Rainbow Gecko Gallery Mixed Media Art, Jewellery, Photography and more....

Here are some of my Rainbow Gecko Gallery products...I create everything :)
Rainbow Gecko Gallery Artwork Prints...

Scrapbook Pages, Art Journals, Jewellery, Beaded Bookmarks, Prints, Notebooks, Stickers  and Stationery

My Rainbow Gecko Gallery Logo Bags...


Rainbow Gecko Gallery Canvas Artworks

All products can be purchased through ETSY
www.etsy.com/shop/RainbowGeckoGallery
All products can be personalised and made to order
Thank You
Sarah
Rainbow Gecko Gallery

Rainbow Gecko Gallery Creating A Studio

Hi Readers, 
I just wanted to share with you where I create...I started out getting serious about mixed media art about a year ago ( I have always been arty just didn't fit into anything particular just had my own style). I started creating some watercolour works on a foldaway table of a night....

This was one of my first artworks it includes watercolours, gel pens, markers, metallic and glitter pens..

I had a small room under the house I turned into my little studio...it was what space I could use and I tried to make the most of it...I am too messy to paint inside and my young daughter ( who loves all my supplies ) constantly rummages through everything....so the majority of my art was made in this room....

Yes.. It is a shed, and yes that is sunlight coming through..although it never leaked...As I said I made do with what i had...

So we had the opportunity to move into a new house, where I had a whole garage-sized room to set up a studio ( DREAM COME TRUE ) obviously we moved and this is what it started out as...

It doesn't look like much i know it's a work in progress...
I have worked hard to try and create a space where friends can come over and enjoy creating...i am always on the lookout to see what I can buy that will suit my space. I have found a few treasures which I use all the time...my indoor clothes drying rack ( which I use to dry my artwork ) and my paper rack ( found at the recycle shop ) 

This is a progress....I hated the cold concrete floor and it was stained, so I found some cheap carpet until I could afford some vinyl flooring. I covered the old doors with some sarongs ( this will be changed eventually to hand painted calico curtains ) Notice I still have my pink hanging pocket...a shoe holder I adapted for art supplies. 


This is where my little Rainbow Gecko Gallery is at NOW :) it has a few specialty features there is no running water so one of my many adaptations is this moveable kitchen bench turned washstand...


For washing brushes and a sink area to wash hands.... And my storage cupboard...

So my studio is still a work in progress...but this is the journey I have been on for the last year...I hope it inspires you to make the most of what you have to create with.
Thank You
Sarah
Rainbow Gecko Gallery